Logic has tools to graphically edit almost all MIDI messages including volume, pan, expression, sustain pedal, patch changes and pitch bend. Logic also has tools to graphically edit almost every knob, fader, button, and slider of any component you see within Logic. Editing can take place in one of two places, either in the MIDI data, or in the track itself. These two methods are termed region based automation and track based automation.
In region based automation MIDI controller data, pitch bend messages, and other MIDI messages are interspersed with the NON and NOF data in the MIDI track. In track based automation, special Logic "meta messages" are used to control component properties in real time in the Mixer, software instrument plugins, and effects.
Create a new empty Logic project.
Save it on the Destop as 18Lab1Automation.
Create one software instrument track.
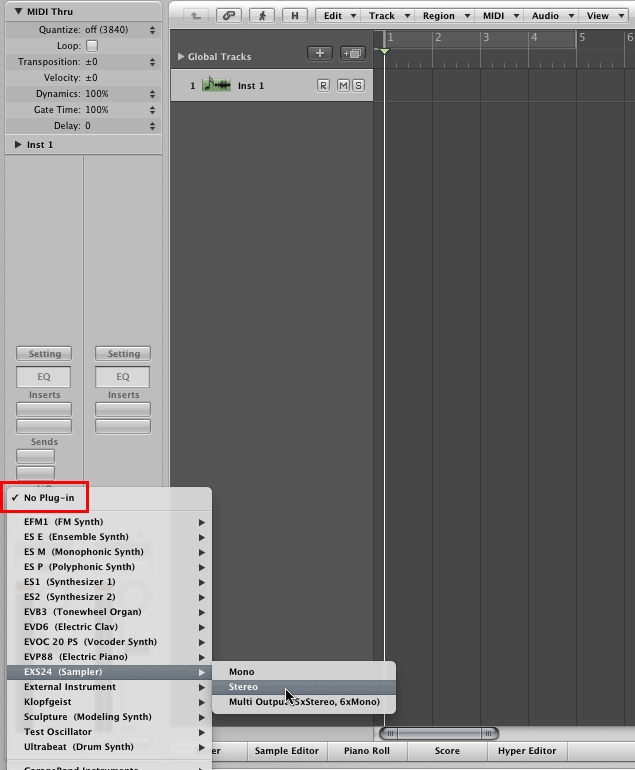
Insert an EXS 24 sampler on the track.
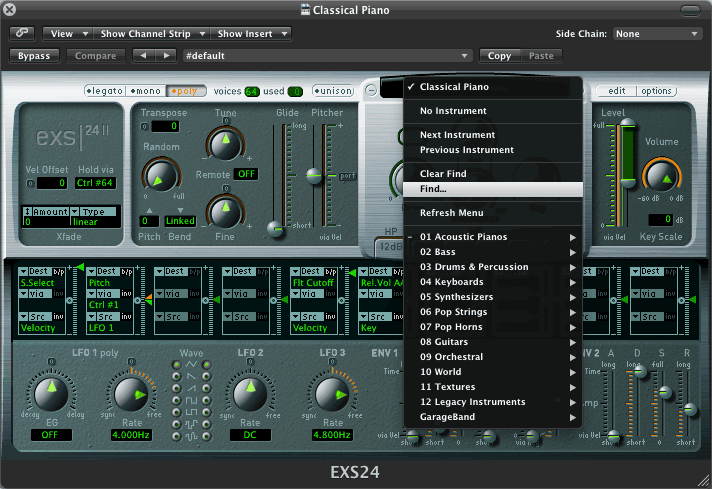
You're going to use a Saxophone. Choose Find from the EXS24 instrument menu.
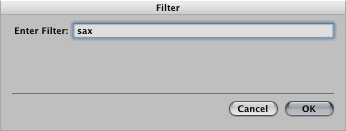
In the Filter dialog, type sax and click OK.
When you return to the EXS24 instrument menu, only instruments with sax in their names will be listed. Choose Alto Sax. On my computer I had these choices.
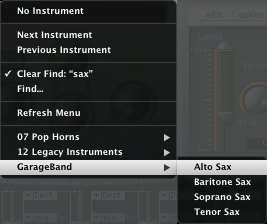
Notice the checkmark opposite Clear find: "sax". Remove the checkmark to get all instrument choices back.
Close the EXS24 window for now.
You're going to enter notes directly in the Piano Roll.
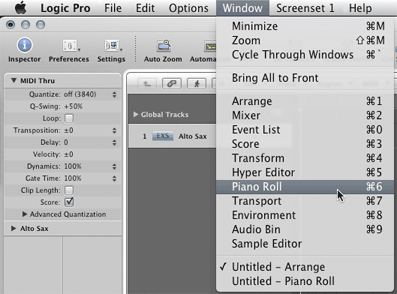
Choose Piano Roll from the Window menu. Shortcut: Cmd-6.
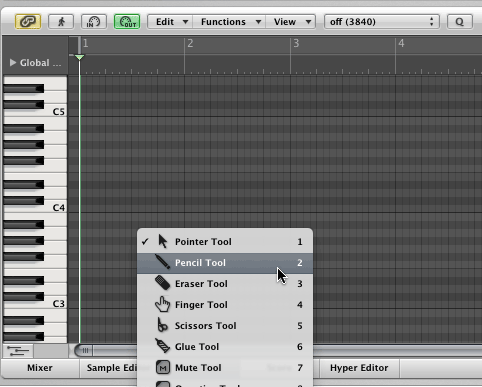
Type Esc and then type 2 for the Pencil Tool.
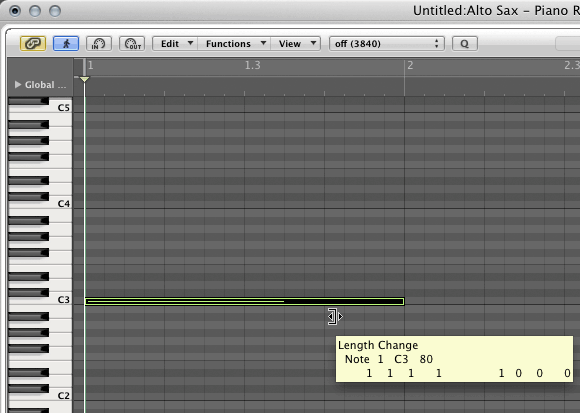
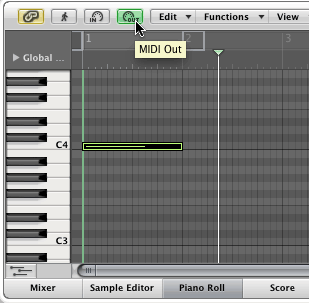
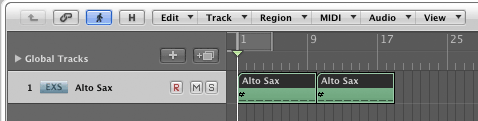
Draw a note on pitch C3 that extends for one measure (whole note).
Type Esc-1 to get the Pointer Tool back.
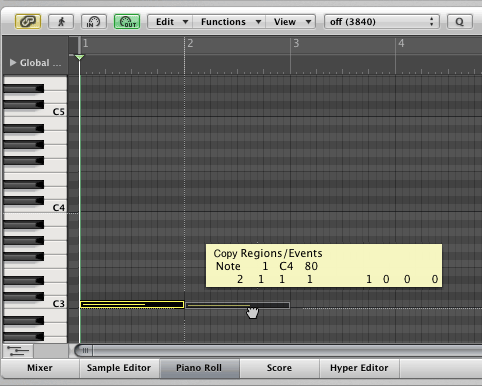
Option-click-drag the note to duplicate it in measure two.
You can turn off the sound by clicking the MIDI Out button.
Repeat until you have whole notes across nine measures.
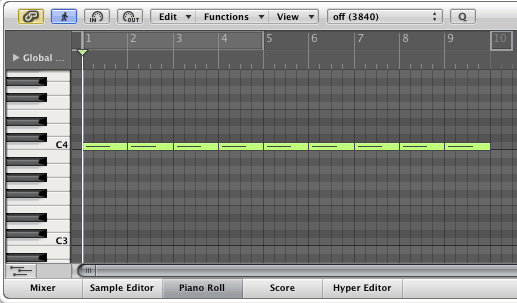
Close the Piano Roll window.
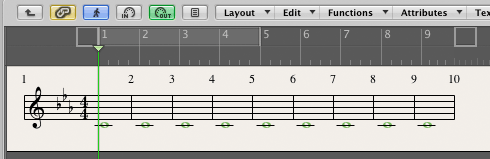
You'll complete the example using the Score Editor.
Open the Score Editor.
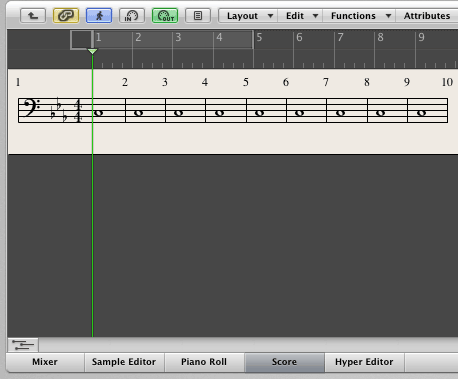
You'll see the notes you entered in the Piano Roll.
Click-drag the Cm button to staff 1 just after the bass clef.
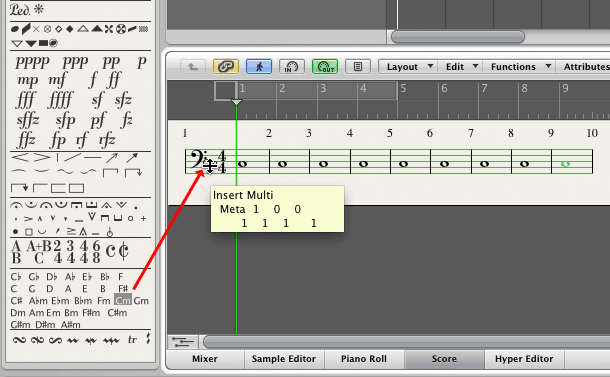
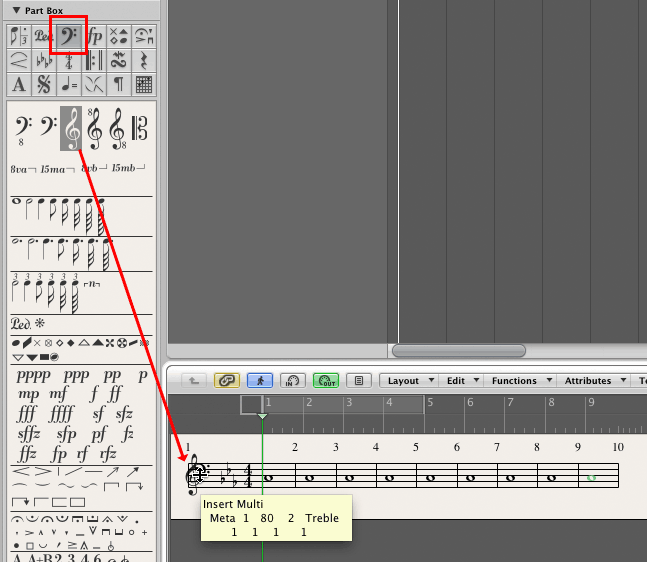
Click the Clef tool, drag the treble clef icon on top of the bass clef in the score, and release the mouse button.
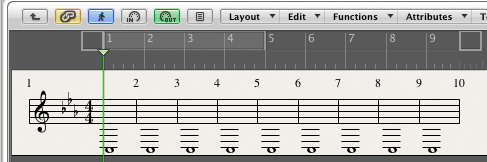
After the clef change the notes are on C3, MIDI note number 48. We want them on C4, middle C, note number 60.
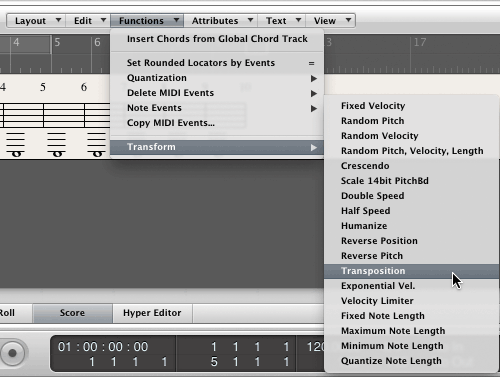
Choose Transposition from the Score Editor Functions menu.
Make these settings in the Transpose window and click the Select and Operate button.
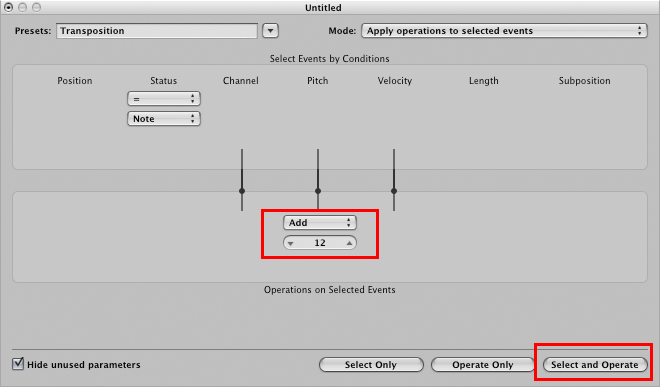
Close the Transpose window.
The notes have been transposed to middle C.
Click in a blank area of the score to deselect the notes.
Switch to the Piano Roll.
Make sure the MIDI region is selected in the Arrange window.
Select all notes in the Piano Roll.
Type Option-Shift-Down Arrow to transpose selected notes down one octave.
Type Option-Shift-Up Arrow to transpose selected notes up one octave.
Leave out the Shift key to transpose selected notes up or down by steps.
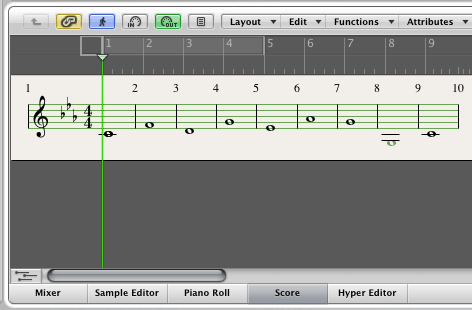
Drag the second note to F4. Watch the information popup to verify the pitch and location.

Change the pitch of the remaining notes to match this example.
Hint: You can do this using only the Left/Right arrow keys and the Option plus Up/Down arrow keys.
Close the Score Editor.
Option-Drag region 1 to measure 10 to create region 2.
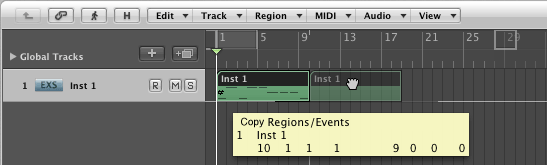
Select Both Regions
Choose Repeat Regions from the Arrange window Region menu.

Repeat 3 times.
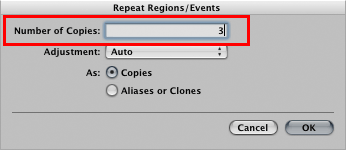
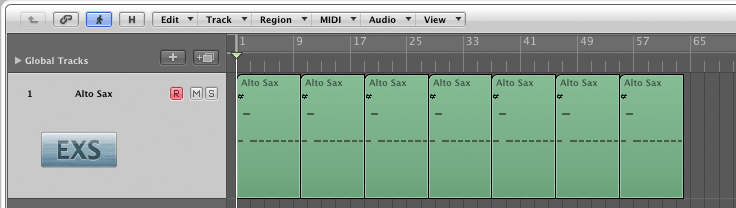
We're only going to use seven regions in this lab. All seven regions are all clones of region 1.
These shortcuts work in most Logic windows
1. Vertical Scrolling - hold the Option key down and move the mouse scroll wheel.
2. Horizontal Scrolling - hold the Shift key down and move the mouse scroll wheel.
3. Horizontal Zoom - hold the Shift+Option keys down and move the mouse scroll wheel.
You're going to automate each of the seven regions with different automation parameters. First up is MIDI Controller 7, Volume.
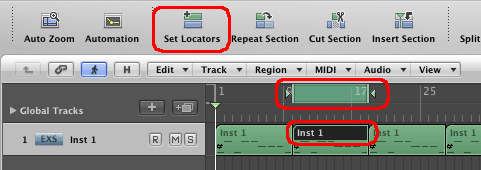
Select region 2 and click the Set Locators button.
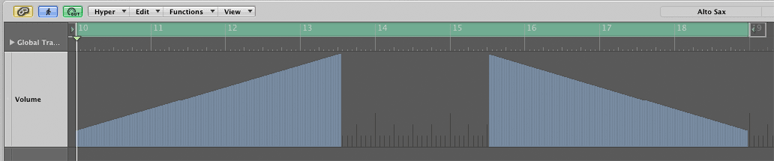
You're going to draw Volume (MIDI Controller 7) messages in region 2.
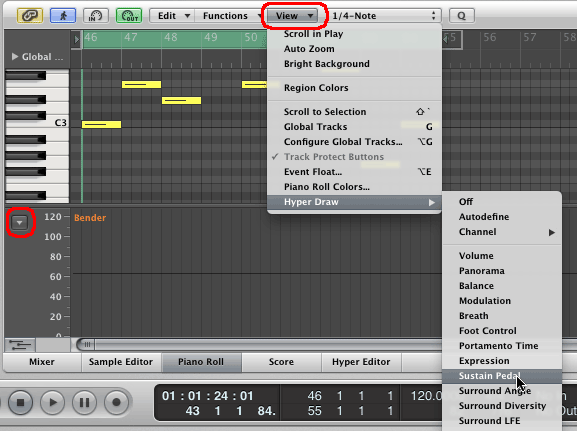
Open the View mini menu and select Hyper Draw/Volume.
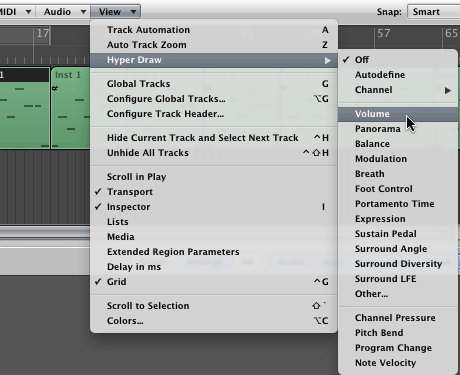
Region 2 will change color to indicate it's now in Hyper Draw mode. The number 7 and a horizontal line will appear in region 2. The number 7 is the MIDI Controller number for volume. The horizontal line represents the value of the controller.
You can use the Auto Zoom button to increase the height of the selected track.

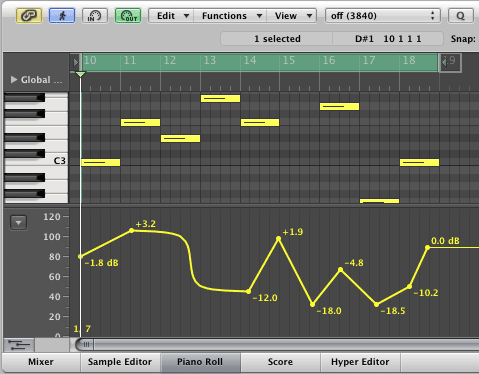
Use the Pointer Tool (Esc-1) to draw volume changes directly in the track lane. Click on the line to create a node. Click-drag a node to move it. The number 7 indicating volume is still present but it may have changed places.
You should see the outlines of the volume control messages you just created.
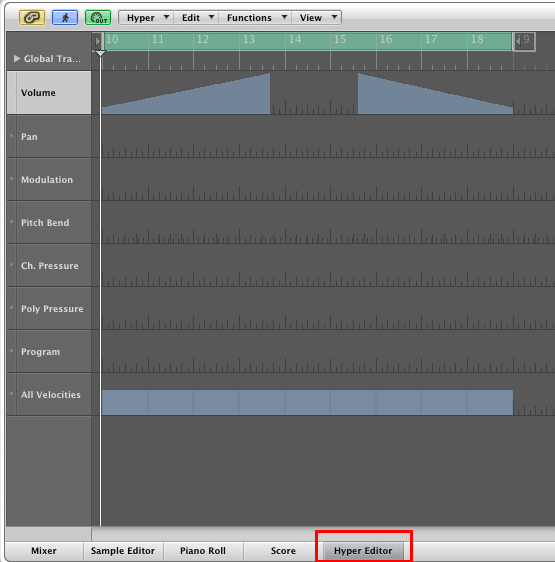
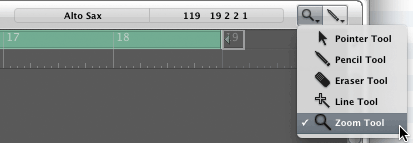
Select the Hyper Editor Zoom Tool.
Using the Zoom Tool, drag a rectangle around the current volume data.
Experiment with the Hyper Editor Pencil Tool, Eraser Tool, and Line Tool. The Pencil and Eraser work as expected. The Line Tool requires two clicks. The first click sets the start of the line, the second click sets the end of the line.
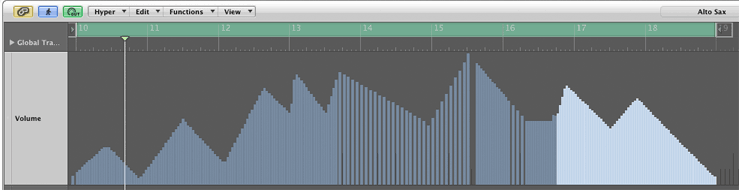
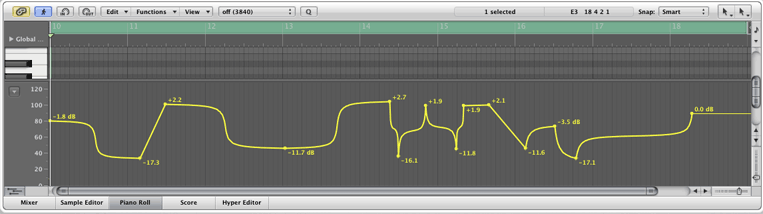
You can also create Region Automation in the Piano Roll and Score Editors.
Click the Hyper Draw button and an editor panel will appear in the lower portion of the Piano Roll or Score Editors.
Note: Logic refers to this editor in the Piano Roll (and Score) as Hyper Draw. Do not confuse it with the Hyper Editor used above.
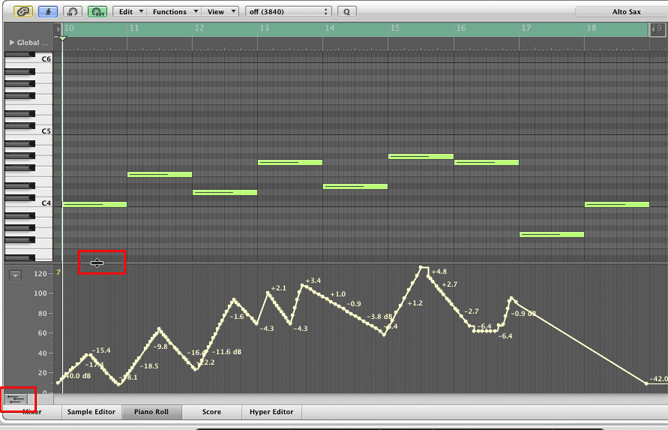
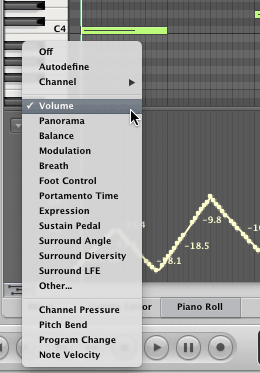
Click the Hyper Draw popup menu to display different MIDI messages available for editing.

Select Volume.
Use the Piano Roll Pointer tool to draw nodes at random. A thin vertical cursor will help you align the Automation nodes with t he piano roll notes.
You may want to increase the Piano Roll size and Hyper Draw Editor size.
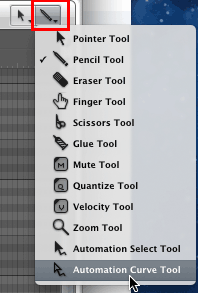
Change the Secondary tool to the Automation Curve Tool.
Hold down the Command key and click to use the Automation Curve Tool.
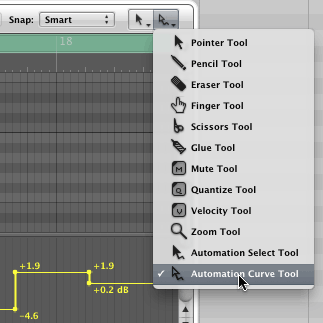
Drag on a line segment (not a node) to create a curve. Remember, 6 dB is twice as loud, -6 dB is half as loud.
Experiment moving and changing nodes as the loop is playing.
Select region 3 and click the Set Locators button.
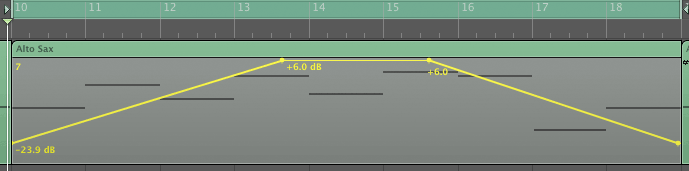
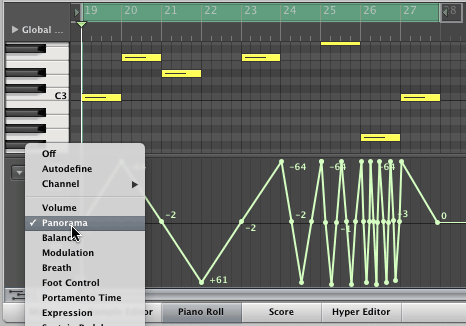
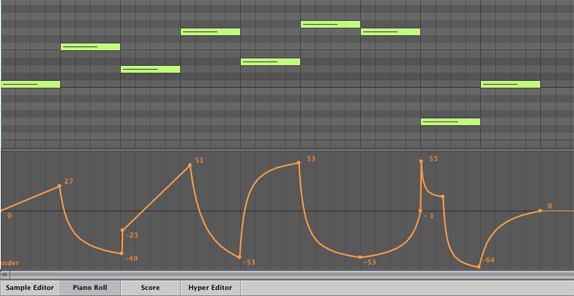
You'll automate Pan messages (MIDI Controller 10) in region 3. Choose Panorama from the Hyper Draw menu.
Draw Pan changes. In the diagram below the pan sweeps from left to right, starting slowly and increasing in speed.
End with Pan set to 0 (center).
Experiment with changing nodes as the loop is playing.
Select region 3 and click the Set Locators button.
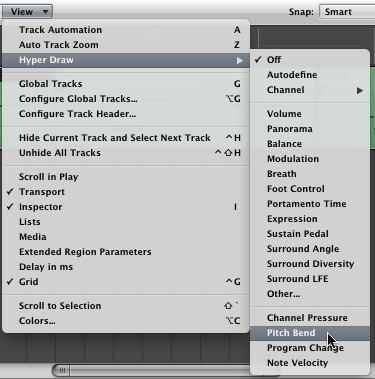
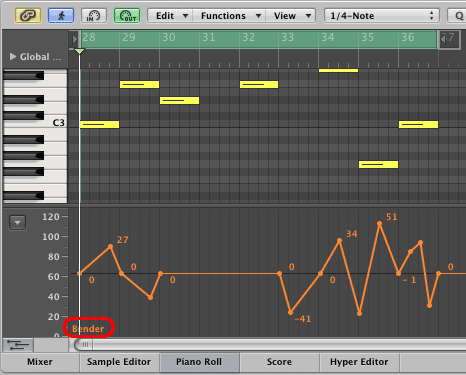
You'll automate Pitch Bend messages (Status byte En) in region 4. Choose Pitch Bend from the Hyper Draw menu.
Draw Pitch Bend changes.
End with Pitch Bend set to zero.
Experiment as the loop is playing.
These two menus control Pitch Bend. Here's what the Logic manual has to say.
"Pitch Bend Up and Down pop-up menus: Determine the upper and lower limit of pitch bending (in semitones) that can be introduced by moving your keyboard’s pitch bend wheel. A value of 0 disables pitch bends.
Note: When you choose Link mode in the right-hand Pitch Bend Down menu, the bend range is identical in both directions—if you assign an upward bend of 4 semitones, the downward bend will also be set to 4 semitones, resulting in a combined bend range of 8 semitones (9, if you include the standard pitch, or “no bend” position)."
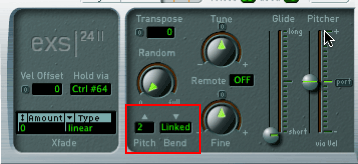
The Pitch Bend range can be changed by changing the Pitch setting in the EXS24.
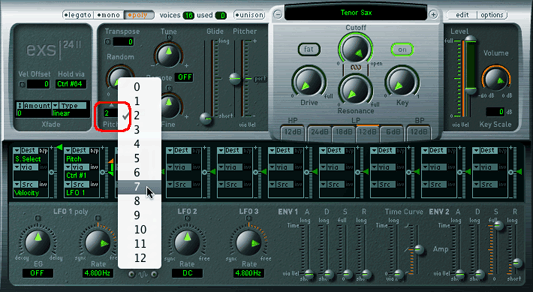
Experiment with Pitch Bend Curves. Begin and end on note boundaries. End on zero.
Select region 5 and click the Set Locators button.
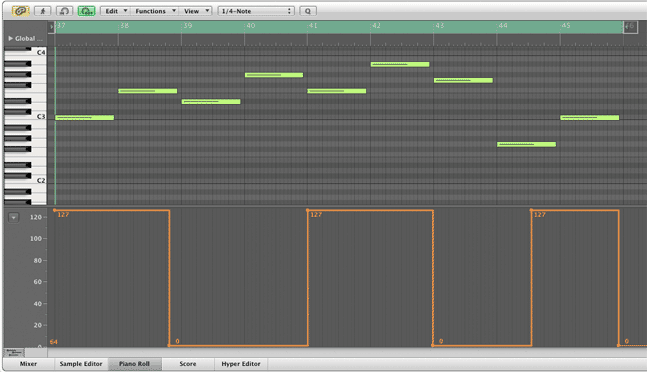
You'll automate the Sustain Pedal messages (MIDI Controller 64) in region 5. Choose Sustain Pedal from the Hyper Draw menu.
Draw Sustain Pedal changes. 0-63 is OFF and 64-127 is ON. You should use 0 and 127 as your two values. The picture below illustrates that 65 is a pedal on.
End with Sustain Pedal OFF (zero).
Experiment as the loop is playing.
Try turning the sustain pedal on in the middle of a note. Nothing will happen until the next note on.
Try turning the sustain pedal off in the middle of a note. You should hear the previously sustained notes disappear and the current note continue.
Select region 6 and click the Set Locators button. Do not enable Hyper Draw.
You're going to copy and paste the volume, pan, and pitch bend events from regions 2-4 into region 6.
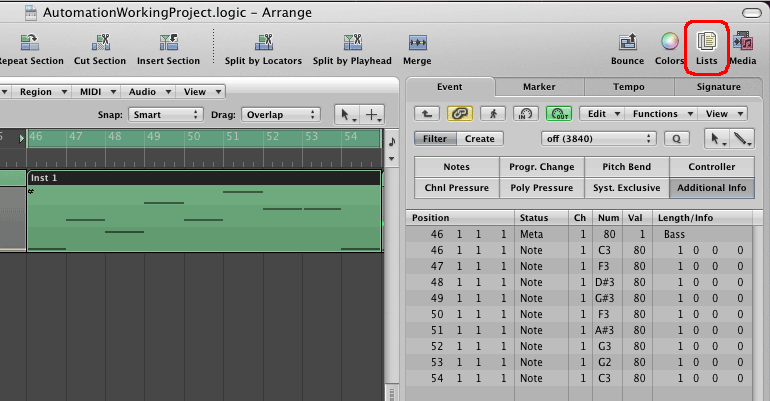
Open Lists View. You should see 9 note events in Region 6.
Adjust the track display until you can see all seven regions.
Select region 2.
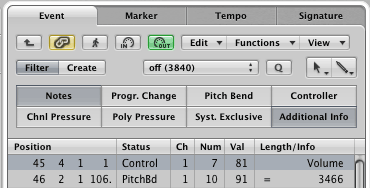
Highlight the Notes button in the List view. You should see the the Volume Control messages and one Meta event.
Select All (Command-A).
Shift click to deselect the Meta Event.
Copy (Command-A).
Select Region 6 in the Arrange window. Click once in the Lists area and Paste. The Volume messages should appear in Region 6.
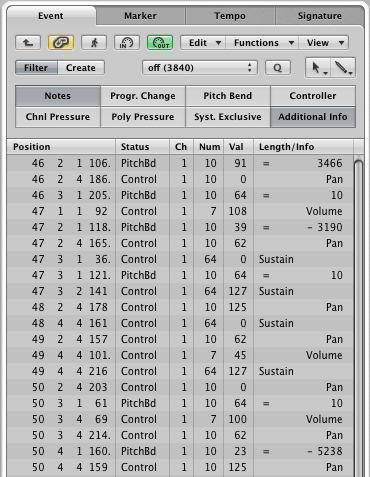
Follow a similar procedure to copy/paste the Pan messages from region 3 into region 6.
Follow a similar procedure to copy/paste the Pitch Bend messages from region 4 into region 6.
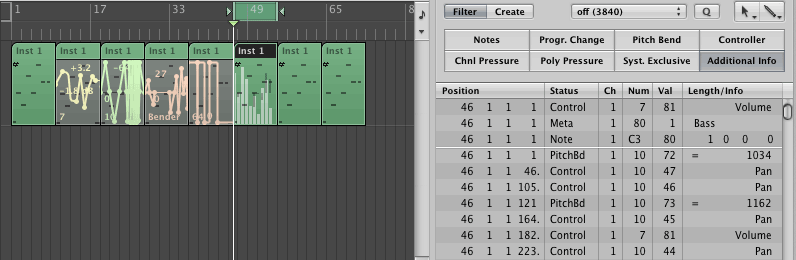
Region 6 in the Arrange window should show the automation as white lines.
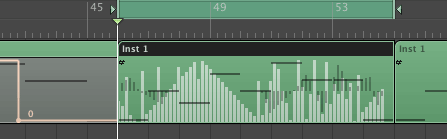
Region 6 starts at 46 1 1 1 . Check to see if f you have any events appearing before then. If you do, select and delete them.
This is region 6 with events before 46 1 1 1 deleted.
You can use se the Hyper Draw menu in the Piano Roll Editor to display the Volume, Pan, and Pitch Bend events; however, you can only display one message at a time.
Select region 7 and click the Set Locators button.
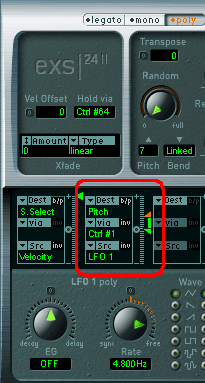
You'll automate the Modulation Matrix in region 7 with MIDI Controller 1 (Modulation) data using Hyper Draw.
Open EXS24. The modulation matrix runs across the center of the EXS24. The modulation matrix holds 10 panels that can be automated. The second matrix panel is highlighted in red. There are three menus in the panel: Dest, Via, and Src. Their default values are Pitch, Ctrl #1, and LFO 1. In the picture below Pitch (Dest) is controlled by the value of LFO 1 (Src) . LFO 1 is controlled by (Via) the value of Ctrl #1 (MIDI Controller for Modulation).
Move all nine notes in the Piano Roll to C4. Then draw Modulation changes similar to these.
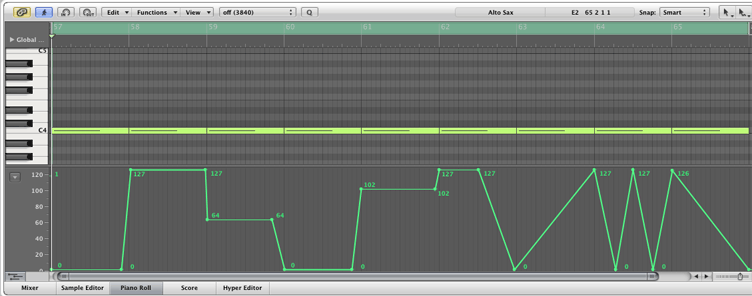
End with Modulation set to zero.
Definition: 100 cents equals one half step.
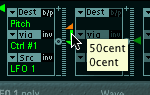
Notice the green and orange slider controls. They represent the minimum and maximum values for Dest when Ctrl #1 is at its minimum and maximum values. They can be moved separately by click-holding on the indicator. They can be moved together by click-holding the area between the indicators.
This is the default setting.
Ctrl #1 is a MIDI controller whose values range from 0-127. The default values indicate that the modulation amount will be 0 (green slider) when Ctrl #1 is 64, and that the modulation amount will be 50 cents (red slider) when Ctrl #1 is 127. 50 cents is a quarter step.
Try these settings.
Drag the orange slider to 1200 cents. Drag the green slider to -1200 cents.
Set the rate to DC by clicking the tiny 0 button just above the Rate knob.
Turn on the square wave button to the right of the rate knob.

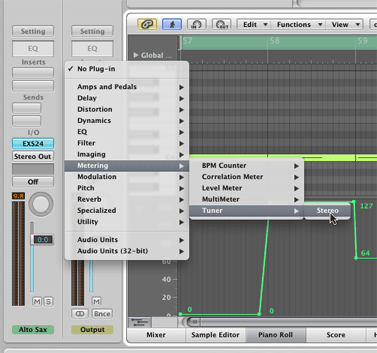
Use the menu in the first Insert button in the Output strip in the Track inspector to select the Tuner plug-in.
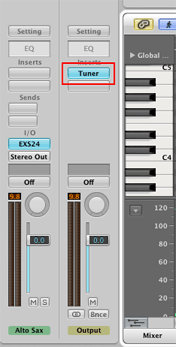
It's in Metering/Tuner/Stereo.
The Tuner plug-in window will open

Watch the Tuner as you play Region 7. When the Ctrl #1 (Modulation) value is 64 the pitch is C3; when it is 127, the pitch is C4; when it is below 0, the pitch C2; and when it is 102, the pitch is G3.
Experiment with the rate knob.
When you're done experimenting, reset the Alto Sax patch to its default settings.

Adjust the arrange window until you can see all seven regions. Turn off any loop.

In this example all automation changes were on the same track assigned to channel 1.
If you're using Hyper Draw on tracks assigned to other MIDI channels, you'll have to use Lists view to match the MIDI Controller channel to the track channel.
Continue with 18Lab2_TrackAutomation.
Revised John Ellinger, January - September 2013